Tag Archives: Lab Coat Care

stubborn-stains-in-clothes

Most Difficult Stains To Remove From Your Clothes (And What To Do About It)

Even if you don’t work in healthcare, stains happen. Whether someone bumps into you while holding a cup of coffee, or you spill your glass of red wine, there are a multitude of ways that life can ruin your clothes.

If you work in healthcare, you’ll probably experience more stains than the rest of us! Here are the most stubborn stains and how to get rid of them.

  1. Blood
    One of the toughest stains to remove is blood – not a good look on an otherwise pristine white lab coat. Rinse the stain immediately under cold water, let it soak in a mix of water and dish soap, and use a stain remover like OxyClean before laundering.
  2. Ink
    If you’ve gone your whole medical career without having a pen explode in your pocket, you are the exception to the rule. Ink stains are unsurprisingly extremely difficult to remove, but most water-based inks should come out in the wash with some stain remover. If you aren’t dealing with performance fabric, some recommend that nail polish remover can help dissolve the stain, but I don’t recommend you do this on any nice clothes that have technologic features imbued in the fabric.
  3. Coffee
    Another unsurprising yet stubborn stain is coffee, the lifeblood of so many working in healthcare. Rinse the stain in cold water as soon as possible – the longer you wait, the more time the stain has to set in. Rub soap on it, but not too hard, and apply stain remover before laundering.
  4. Wine
    It’s a vice of many, and it’s hard to get out of your clothes if you’re a fan of the reds! Experts suggest that to remove a wine stain, soak the garment in a mixture of water, dish soap and white vinegar. Rinse and apply an enzyme-based stain remover before washing.

A good rule of thumb to remember whenever dealing with a stain, is to avoid hot temperatures as this will cause the stain to set into your clothes.

tipsfor-whitening-lab-coat

5 Tips To Keep Your Lab Coat White And Bright

Nothing says professional like a crisp, white lab coat. The white color is highly significant in the medical profession, as it has come to symbolize cleanliness and purity. Wearing an immaculate white lab coat sends a strong visual signal to your patient that you are diligent and thorough, and instills a greater subconscious sense of trust in your patient-physician relationship.

Here are some tips for keeping your white lab coat as bright and white as the day you got it.

  1. Separate your colors – seriously. Even light colors can transfer onto whites.
  2. Don’t use too much detergent, which can leave residue on clothes that acts like a magnet and sticks to dirt.
  3. Use a bluing agent to remove a yellowish tinge, but make sure to read and follow the instructions.
  4. Don’t use bleach. White clothing is actually dyed to be white, and bleach can strip the whiteness away leaving behind a dingy greyish color.
  5. Use white vinegar or lemon to make your whites brighter, by adding 1/4 a cup of vinegar or lemon juice and warm water and letting your whites soak before washing. Do not mix with ammonia products!!

How To Remove Coffee Stains From Your Lab Coat

One of the most frequent ways to ruin your lab coat is that beverage you’re always drinking: coffee stains. Coffee is unavoidable if you work in medicine, and if you’re human, spills will happen.

If you have a cheap lab coat or one that is made of cotton or other natural fibers, unfortunately you probably can’t do too much except throw that lab coat away. That’s because natural fibers tend to absorb liquids really quickly and cling to the colors that created the stain.

If you’ve made the (smart and practical) decision to get yourself a high-quality lab coat made of performance fabrics, there’s a high probability you will be able to get that stain out! As a matter of fact, if you take a look at the reviews for this brand of white lab coats, you’ll see a lot of people have had no problem rinsing out coffee stains because of the durable, technological fabrics they use.

Here are the steps you should take to save your lab coat from a coffee stain:

  1. Rinse the stain immediately. Literally, as soon as you can get to a faucet, rinse the stain. Don’t bother with trying to spot clean. It’s not going to work.
  2. Apply a stain remover to the brown patch. The designers at Medelita have recommended OxyClean, but the most important thing is to take action as soon as you can. The sooner you apply the stain remover, the better chances you can salvage your coat!
  3. Launder as normal with NO BLEACH. The stain should have been released during the wash, and if you have a lab coat made of performance fabric then the bleach will wear down the fibers.
Resew Button Onto Lab Coat

How To Sew A Button Back Onto A Lab Coat

No matter how good the quality of your clothes, including but not limited to your white doctor’s coat, there will be instances of seams coming loose or buttons falling off. That is just the nature of clothing, but with a little sewing know-how, you can do some of these wear-and-tear-repairs from your home.

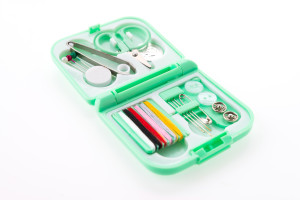
Everyone should have at their home a mini travel sewing kit – these come with threads of many colors, needles, a pin, and a needle threader (so you don’t have to squint at the eye of that needle to get the thread through!) and a small pair of scissors. If you don’t already have one, they cost about $6 at your local drugstore and are always small enough to fit in a handbag.

Mini Travel Sewing Kit

Re-sew a button

  1. Choose your thread color and cut a length 2x longer than the amount you think you’ll need.
  2. Thread your needle, looping the thread around and retying it at both ends, creating a giant loop of thread with the needle hanging. This is a handy way to keep the thread from falling out of the needle, and saves you time rethreading your needle. It also creates the knot you’ll need to prevent your thread from falling out.
  3. Align the button with the other buttons on your lab coat, and push the threaded needle up through the fabric and through one hole in the button. Use a pin between the stitch you have made and where the next stitch will go to in order to keep from stitching the button too tight. Push the needle down through the hole, through the fabric, and pull the thread all the way through with your needle.
  4. Repeat this process, crisscrossing your thread in an x-shape if its a 4-hole button, until the button is secure.
  5. Push the needle into the fabric under a place that the button covers and make a 3 more stitches to secure the thread further.

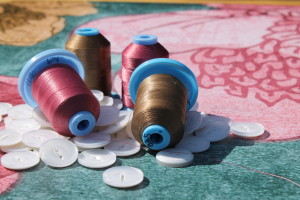
Sewing Button Onto Lab Coat

How To Take Care Of Your Lab Coat

It’s not a secret that when you invest in your professional appearance by purchasing a Medelita lab coat, you will want to make sure it lasts as long as possible. After all, you wouldn’t buy a new iPhone without getting a durable case and screen protector, would you?

The quality of these products begins with the quality of the performance fabric and a Medelita M3 lab coat has several advantages in terms of easy garment care. Medelita M3 fabric has the highest rating in the industry when tested for strength, soil release, and fluid repellency.

M3 H.W. Cushing Lab Coat

M3 H.W. Cushing Lab Coat

For starters, Medelita M3 lab coats are much more durable than traditional cotton so you can wash your coat regularly without fabric wearing, fraying, or color fade. The hydrophobic technology on the outer layer repels soil and liquids so that they literally roll right off your lab coat without leaving a stain. Bacteriostatic technology integrated in the fabric keeps odors from becoming trapped in your lab coat. And did we mention that these coats are highly wrinkle resistant?

To maintain the quality of your Medelita M3 lab coat, follow these instructions:

  • Pre-treat any stains prior to washing. Use the guide below to find the best stain remover.

    Screen Shot 2015-08-05 at 12.06.09 PM

  • Machine wash warm, regular cycle with other whites only.
    • Do not use chlorine bleach. Non-chlorine bleach is ok.
    • Do not use liquid fabric softener – it will block the moisture wicking fabric feature.
  • Tumble dry medium.
    • Pull out of the dryer early and fold, or place on a hanger to ensure a smooth, wrinkle-free appearance.
    • Do not use a dryer sheet – it will block the moisture wicking fabric feature.
  • The M3 fabric is naturally wrinkle resistant, but you can iron as needed at low to medium heat—maximum 300 degrees Fahrenheit.